Nautilis iSpindel iRelay NXT
Smart solution for fermentation monitoring
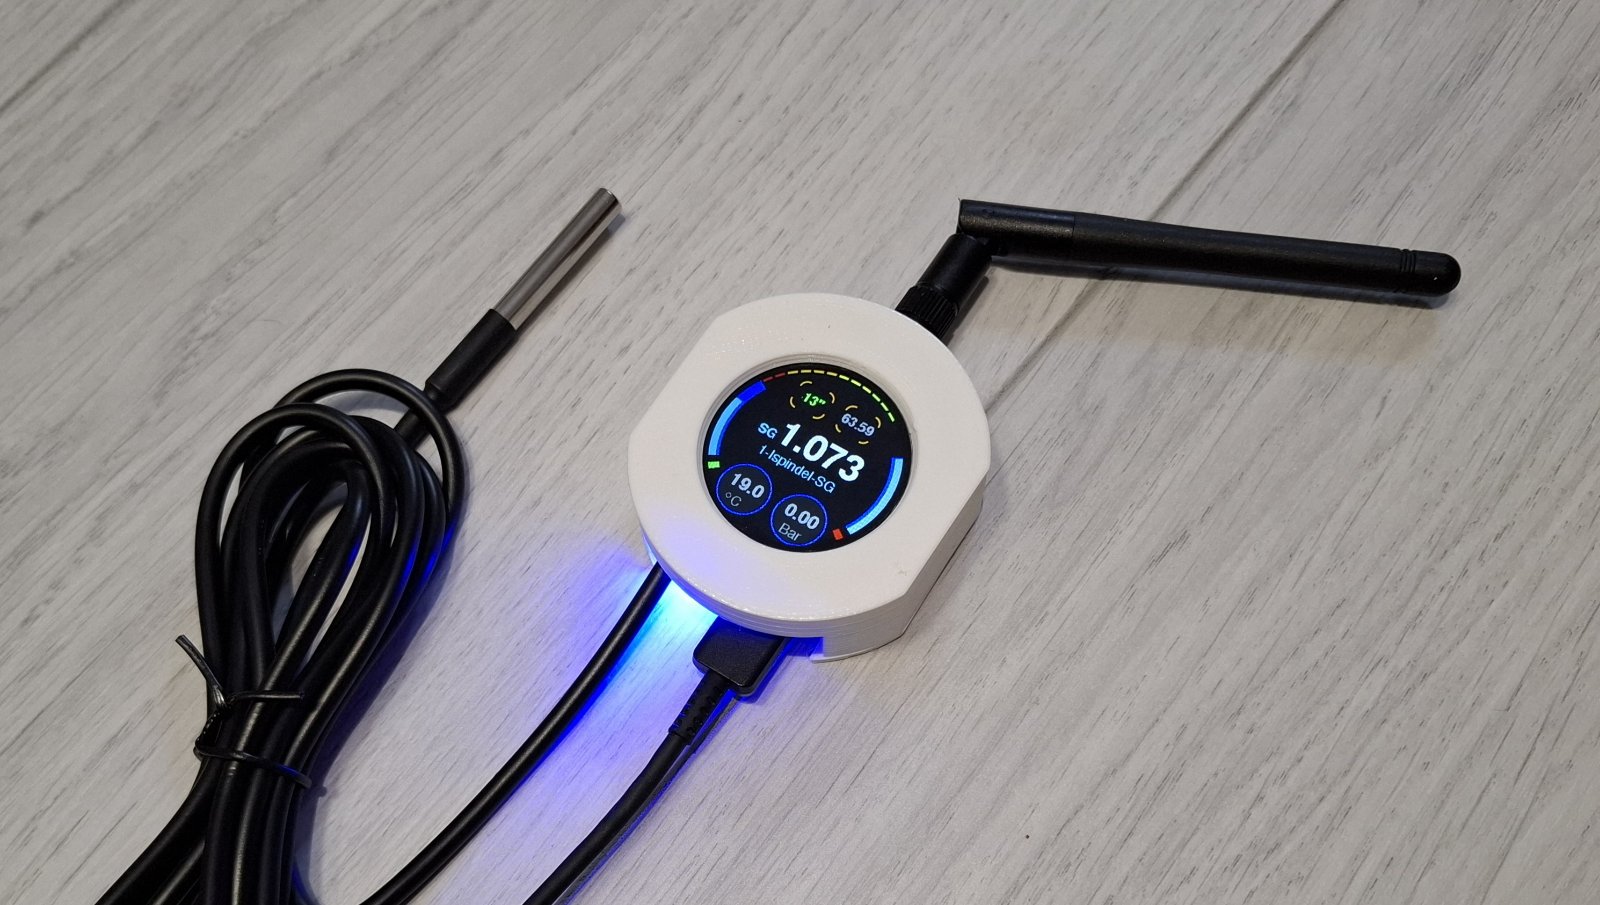
The iSpindel WiFi iRelay NXT is an advanced device designed to receive, process, and distribute data from digital hydrometers iSpindel and HYDROM. It ensures reliable fermentation tracking by displaying data on a 1.28″ round TFT screen, accessing it via the local web interface, or forwarding it to supported applications.
Supported fermentation monitoring platforms:
✅ MQTT / Home Assistant
✅ BrewSpy
✅ Brewfather
✅ Monitor.Beer
✅ Grainfather
✅ Little Bock
✅ Brewers Friend
✅ BrewBench
✅ UbiDots
✅ HTTP
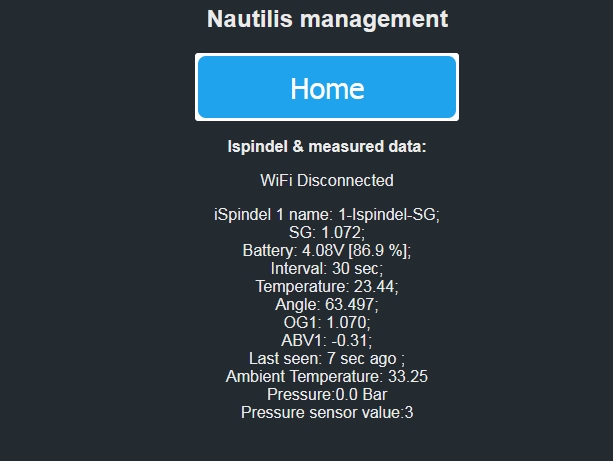
What does the device screen display?
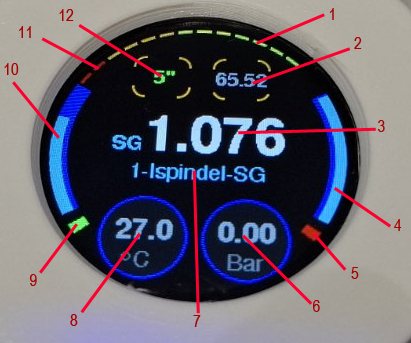
✔️ (1) Hydrometer battery voltage
✔️ (2) iSpindel tilt angle
✔️ (3) Temperature
✔️ (3) Specific Gravity (SG)
✔️ (4) WiFi Signal strength
✔️ (5) WiFi status
✔️ (6) Pressure (if pressure sensor is connected)
✔️ (7) Hydrometer name
✔️ (7) iRelay name
✔️ (8) Temperature (ambient or probe-based)
✔️ (9) iSpindel status
✔️ (10) iSpindel signal strength
✔️ (12) Last hydrometer reading (changes color if the spindle is not seen in the interval)
Exceptional WiFi connectivity
✅ Tested in extreme conditions:
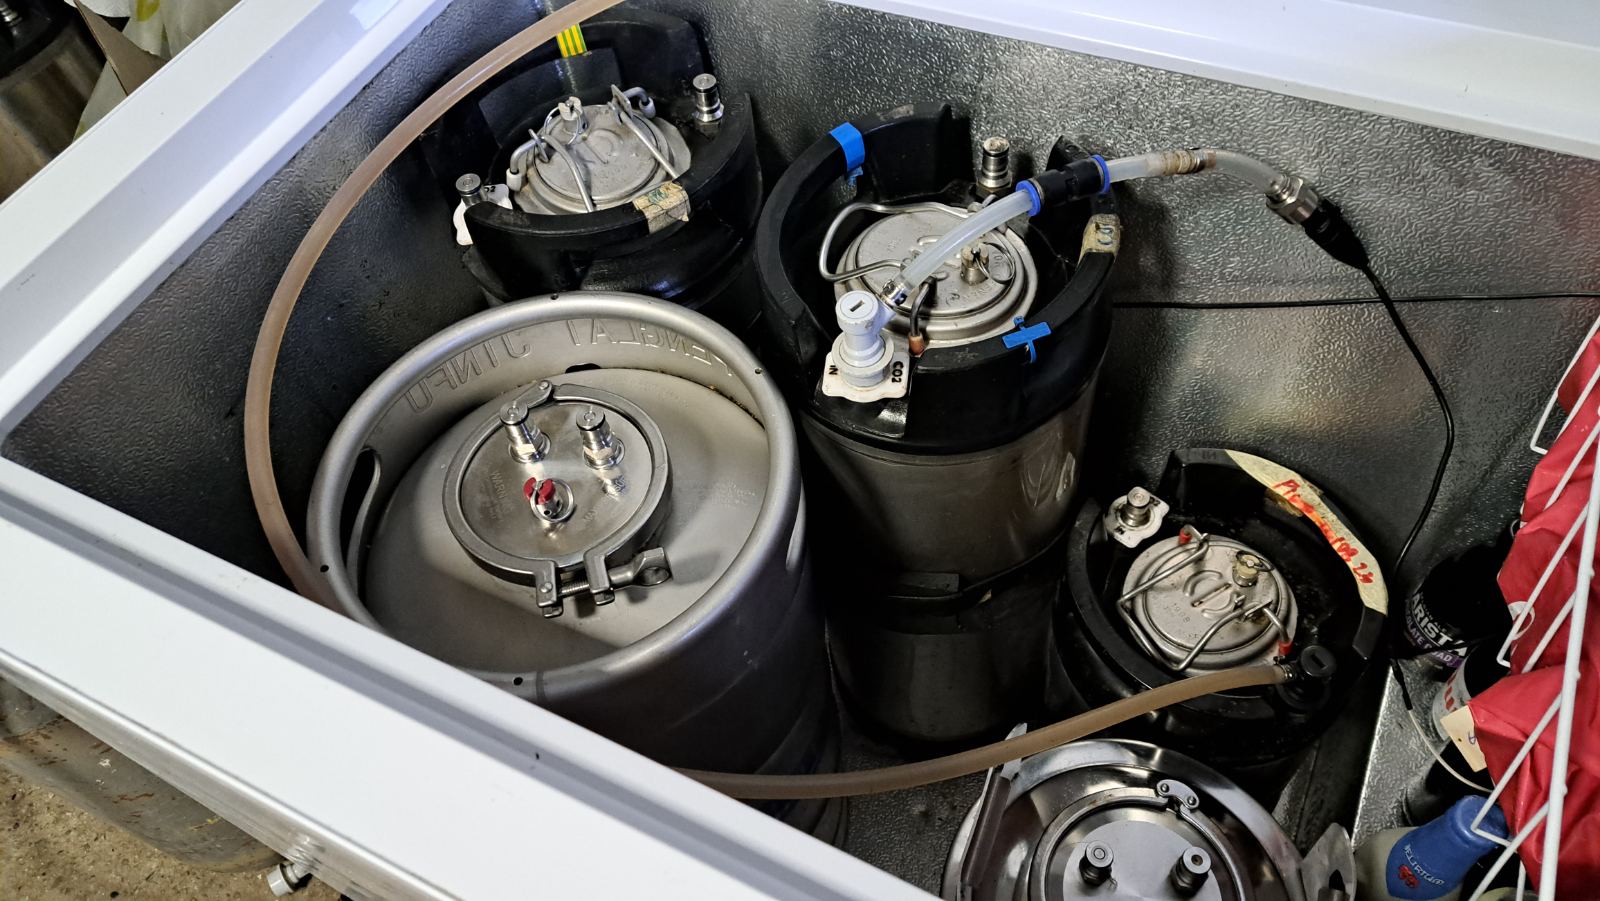
The hydrometer was placed inside a 2 mm thick stainless steel fermenter with a 6 mm thick lid and locked in a freezer. The signal still penetrated easily.
✅ Energy efficiency:
Due to its reliable connection, iSpindel consumes less battery, significantly extending its lifespan.
✅ Internet-independent operation:
- iSpindel no longer requires the internet to send data to iRelay.
- iRelay also does not need the internet unless remote monitoring is required via one of the supported apps.
Power and charging
🔌 Powered via a standard 5V USB-C charger (mobile phone charger).
⚠️ Recommended cable: USB-A to USB-C (not compatible with USB-C to USB-C cables).
⚡ Ultra-low power consumption.
Additional features
Faster hydrometer calibration
✔️ Displays the tilt angle to assist with precise calibration.
✔️ Rotatable display for ultimate flexibility.
Wireless firmware updates (OTA)
✔️ Regular firmware improvements via the web interface.
✔️ No need for physical connection to a computer.
Supports two iSpindel hydrometers simultaneously
✔️ Audio confirmation tone when saving settings.
✔️ Alarm for high or low hydrometer temperature.
✔️ Notification when the specific gravity (SG) drops below a set threshold.
Automatic SG and temperature correction
✔️ Applied to both the display and Blynk app.
✔️ Option to choose between Plato and SG units.
✔️ Plato-to-SG conversion available in the iRelay web interface (affects display only, apps receive raw iSpindel data).
Add-ons: Thermometer, Pressure Sensor & Decorative LED Lighting
🌡️ External or ambient thermometer
✔️ Alarm when temperature is too high or too low.
✔️ Extendable sensor cable without affecting accuracy.
✔️ Fermentation monitoring: Can be placed on the fermenter shell to prevent temperature controller failure (STC-1000).
✔️ Temperature unit selection: °C or °F.
✅ Integration with:
- Homeassistant, BrewSpy, Brewfather, Grainfather (temperature updates every 1.5 or 15 min).
🔄 Nautilis iRelay NXT-P (Pressure Sensor)
✔️ Displays pressure readings on-screen and sends data to applications.
✔️ Compatible applications:
- Homeassistant (min 10 sec interval)
- BrewSpy (min 5 min interval)
- SensorSpy (min 5 min interval)
- Brewfather (min 15 min interval)
✔️ Alarm notifications via mobile apps.
✔️ Units: Bar or PSI.
⚠️ The pressure sensor is sold separately.
🔗 Order here.
Decorative LED Lighting
The decorative LED lighting is blue and can be turned off if needed. It adds a stylish touch to the iRelay case, especially when a magnet is attached to the case, allowing it to stick to a fridge for a sleek and modern look.


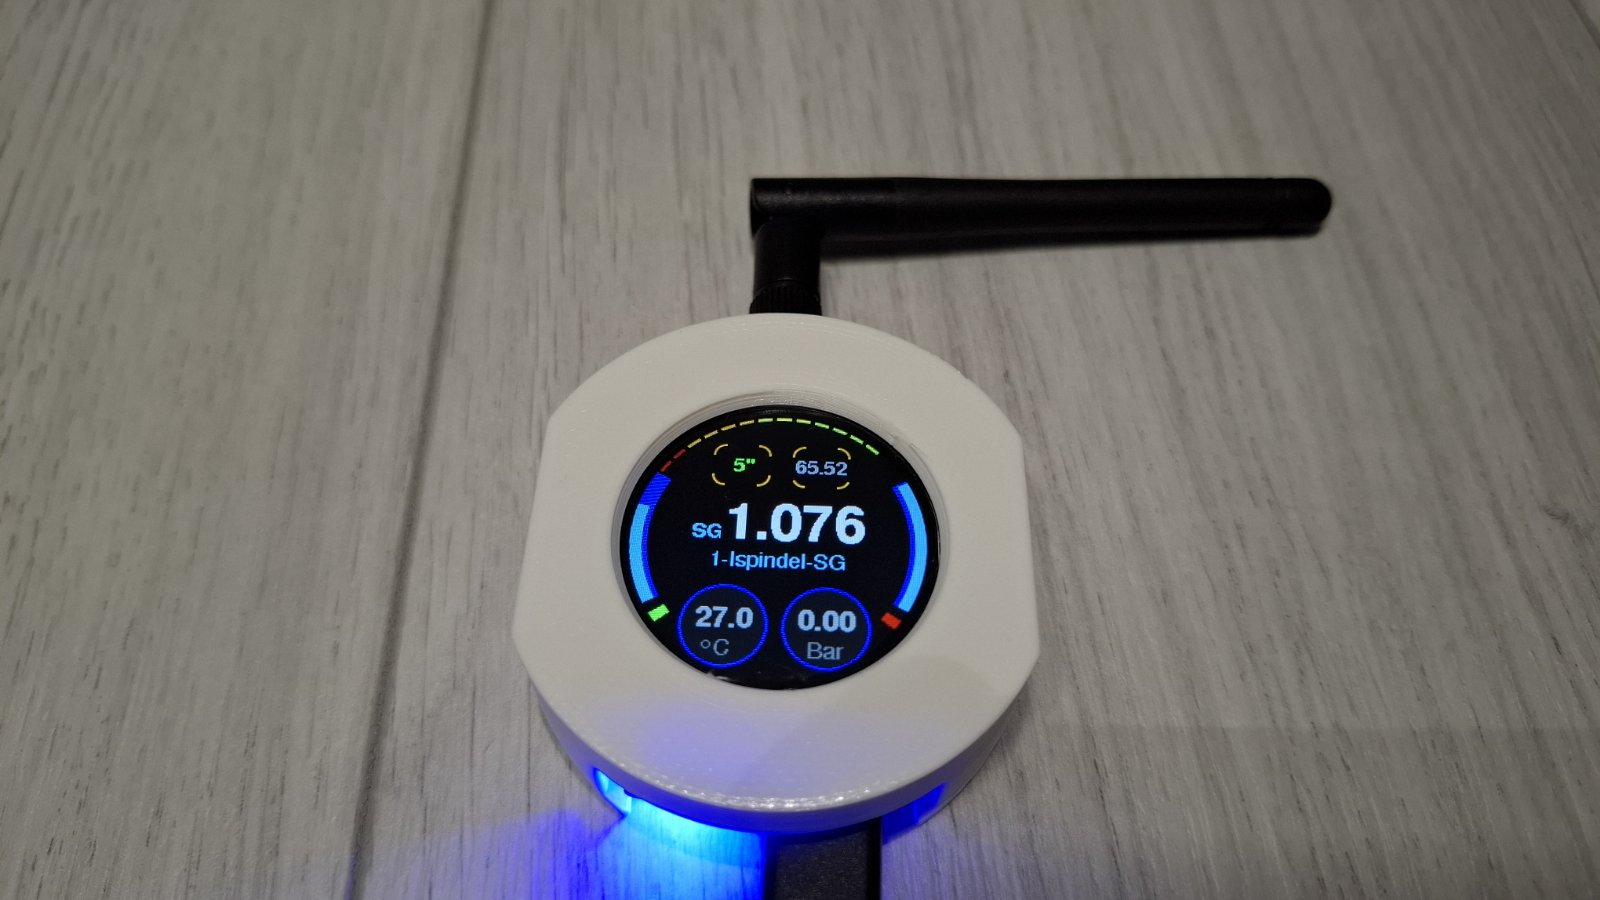
iRelay NXT
– 1,28″ TFT LCD screen
– 3d printed case
– Ambient thermometer built into the box
– 2.4G Wireless Antenna
– Blue decorative LED light
– worldwide shipping with tracking number
Price: 42€
iRelay NXT (2m+P)
– 1,28″ TFT LCD screen
– 3d printed case
– thermometer on 2 m cable
– 2.4G Wireless Antenna
– Blue decorative LED light
– pressure support (Hardware& software changes)
– worldwide shipping with tracking number
Price: 52€
How to use Nautilis iRelay?
First change settings on the Ispindel management
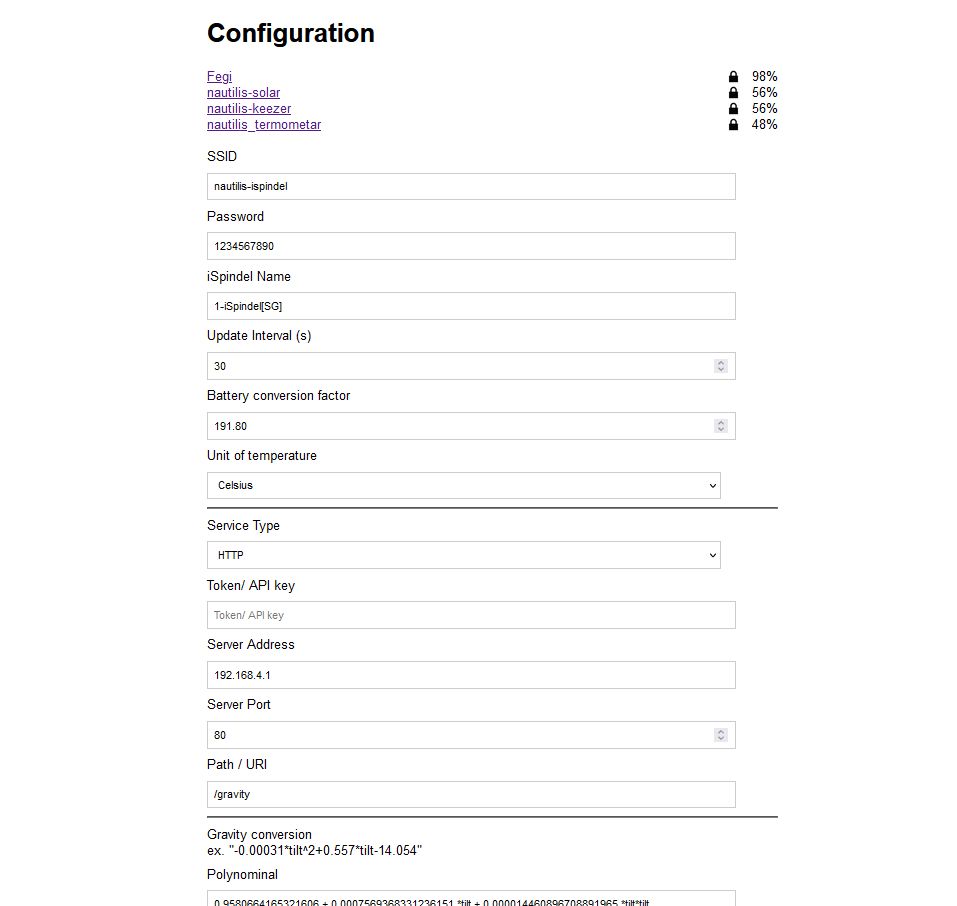
Turn on your Ispindel and change the Configuration parts in the WiFi manager to:
SSID: nautilis-ispindel (If you have changed the AP SSID then enter the changed ssid here.)
PASS: nautilis-ispindel ssid password (If you have changed the AP Password then enter the changed pass here. The relay comes with a piece of paper with your password written on it.)
iSpindel name: 1-enter_your_name[SG] //The first character of the name must be a number; for Brewfather add [SG] on the end, without spaces. A maximum of 16 characters may be in the name of iSpindel. Some special characters take up more space, so make that number smaller. If the name is too large, there is a possibility of periodic resetting of the device.
Service Type: HTTP
Token: leave blank! // If there is a space here, the device will not connect.
Server address: 192.168.4.1
Server port: 80
Path/URI: /gravity
Don’t forget on the calibration formula! Use the SG calibration table located at this link.
If you use 2 iSpindels:
All settings are the same as on the first iSpindel, except that the name of the second iSpindel must start with the number 2:
iSpindel name: 2-enter_your_name-[SG] // first digit and then name and finally [SG] for brewfather
Nautilis Controller management system
View and edit relay settings (no internet required)
To view and change the device settings, first connect to the WiFi network that the device transmits, which is usually: nautilis-ispindel. After connecting to the network, some devices automatically open the Internet browser, and some require you to open the Internet browser and go to the address: 192.168.4.1
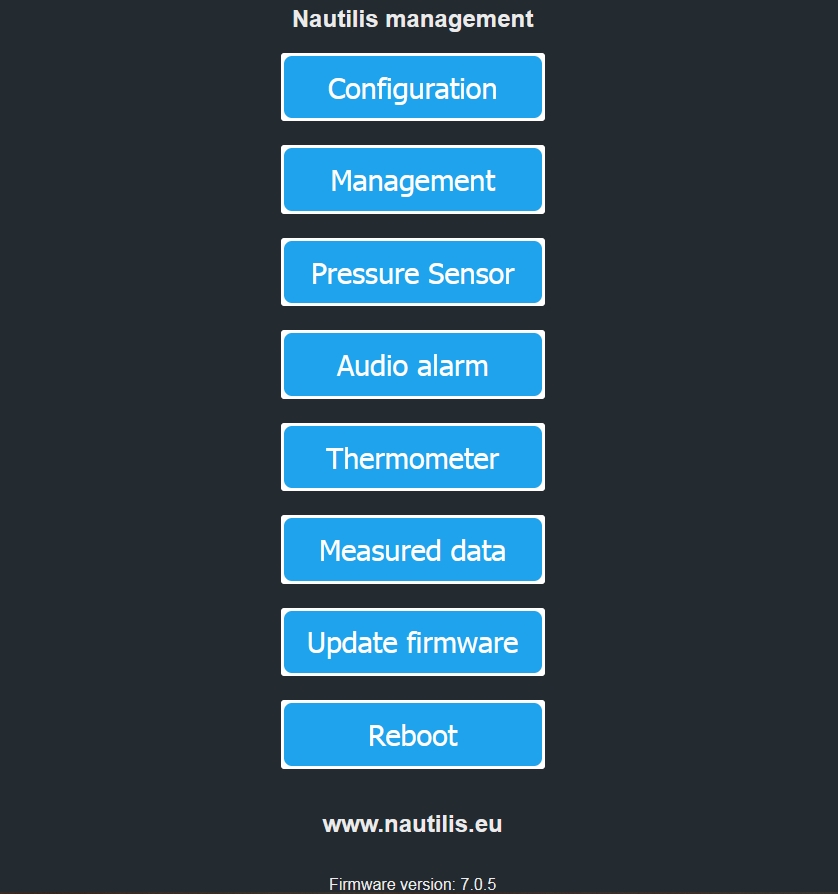
After that, the Nautilis Controller managment home page opens where you can view and edit the following settings:
-Configuration (configuration of your WiFi network, and other services)
Leaving one of the fields blank will save it as blank. The current settings view is at the bottom of the page. After saving, the device needs to be physically restarted, or you can use the Nautilis Controller management and the Reboot menu to make the changes active.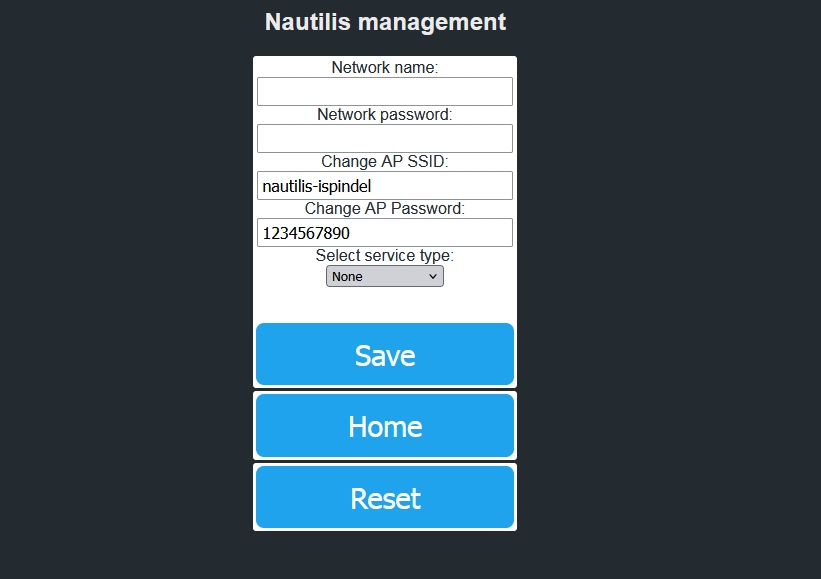
AP SSID & PASSWORD
As of firmware version 6.3.1, it is possible to update and change the AP SSID and password. This means that if you change it you have to change it on the iSpindel settings as well. Now the WiFi network transmitted by the relay can have the name of your choice. Do not use special characters, spaces, or more than 16 characters in the network name. When using 2 or more relays, the WiFi network names must be different between them.
 To set up the UbiDots service, you need:
1. Network name (watch out for your WiFi network – be case sensitive), 2. Network password (select your WiFi network password) 3. Select service type (check Ubidots); save these settings and go back – then a new field appears in which you enter the rest data, 4. TOKEN (your API token in your Ubidots STEM account)
Please change your iSpindel name so that it only includes letters, numbers, periods, hyphens or underscores. [] in the name is unaccepted for Ubidots.
Ubidots new device to send the temperature of the thermometer from the relay: The Ubidots service must be marked and stored on the relay. Then a new field appears in the relay settings: Custom Stream URI/TOKEN in which you need to paste the Ubidots Token. Select the sending interval in the Thermometer menu.
 To set up a Brewfather service, you must:
1. Network name (watch out for your WiFi network – be case sensitive), 2. Network password 3. Select service type (select Brewfather); save these settings and go back – then a new field appears in which you enter the rest data, 4. PATH / URI (enter your personal PATH / URI; Path URI should look like example: /ispindel?id=123456789 You can find it in the settings of the Brewfather application when you click on iSpindel)
Brewfather Custom Stream to send the temperature of the thermometer from the relay: The Brewfather service must be marked and stored on the relay. Then a new field appears in the relay settings: Custom Stream URI in which you need to paste the Brewfather URL for the Custom stream.
Custom stream URI should look like example: /stream?id=123456789
The temperature appears on the application in an interval of 15 minutes (min 900 seconds).


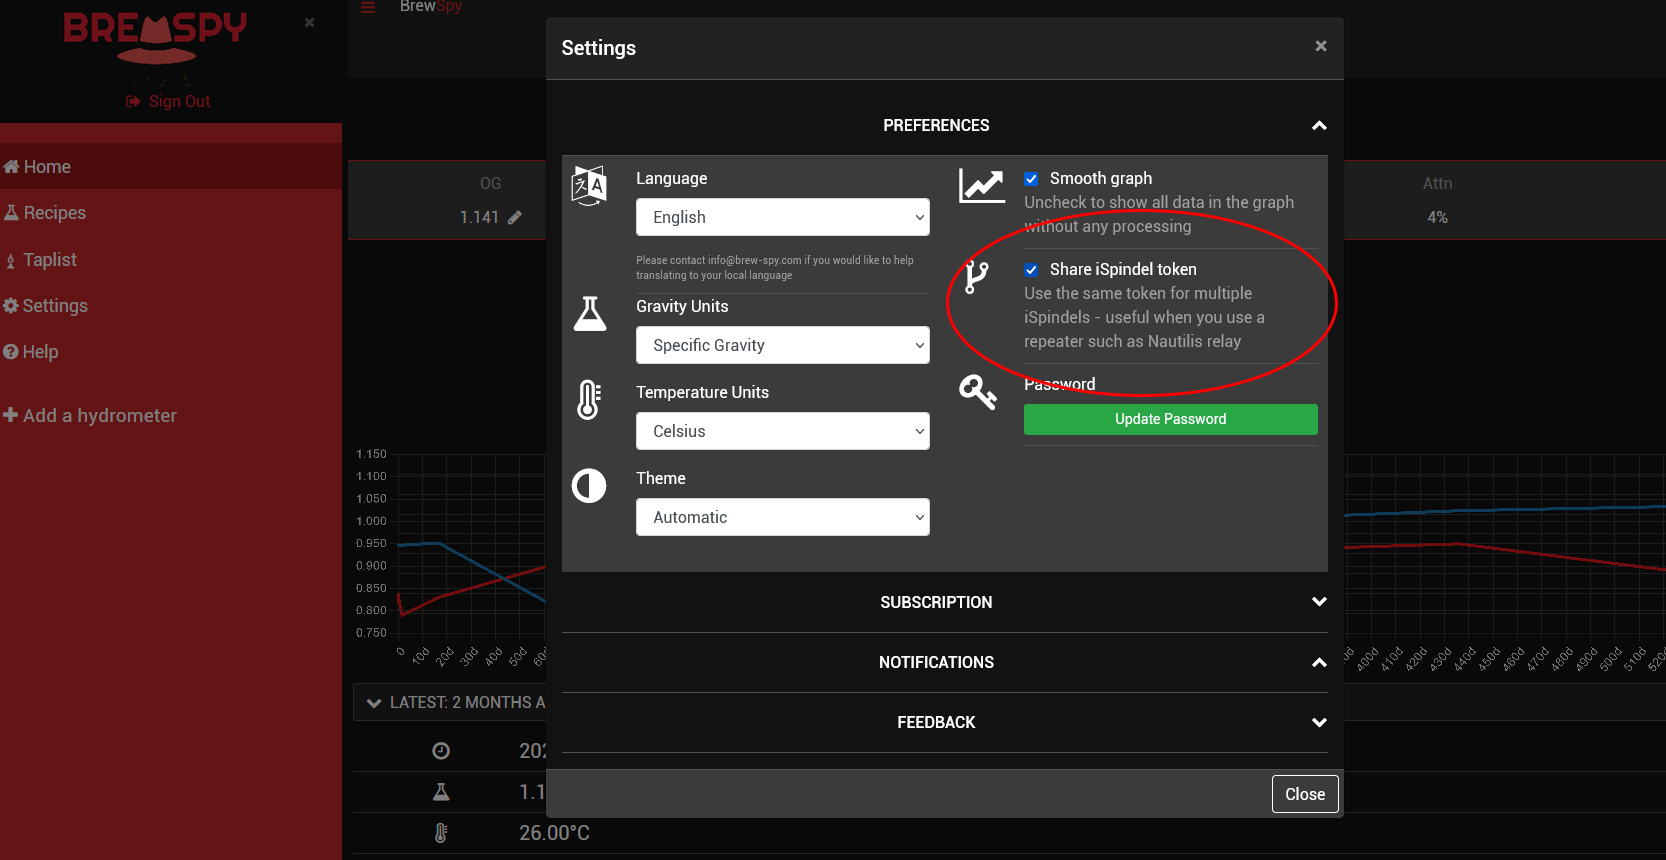
 To set up a BrewSpy service, you need:
1. Network name (watch out for your WiFi network – be case sensitive), 2. Network password 3. Select service type (highlight BrewSpy), 4. TOKEN (your hydrometer token you use). BrewSpy service can use multiple hydrometers. The limitation is relate; save these settings and go back – then a new field appears in which you enter the rest datad to iRelay. So 1 iRelay can send data for 2 iSpindels. All you need is to check Share iSpindel token in Brewspy settings menu & Nautilis relay will do the rest.
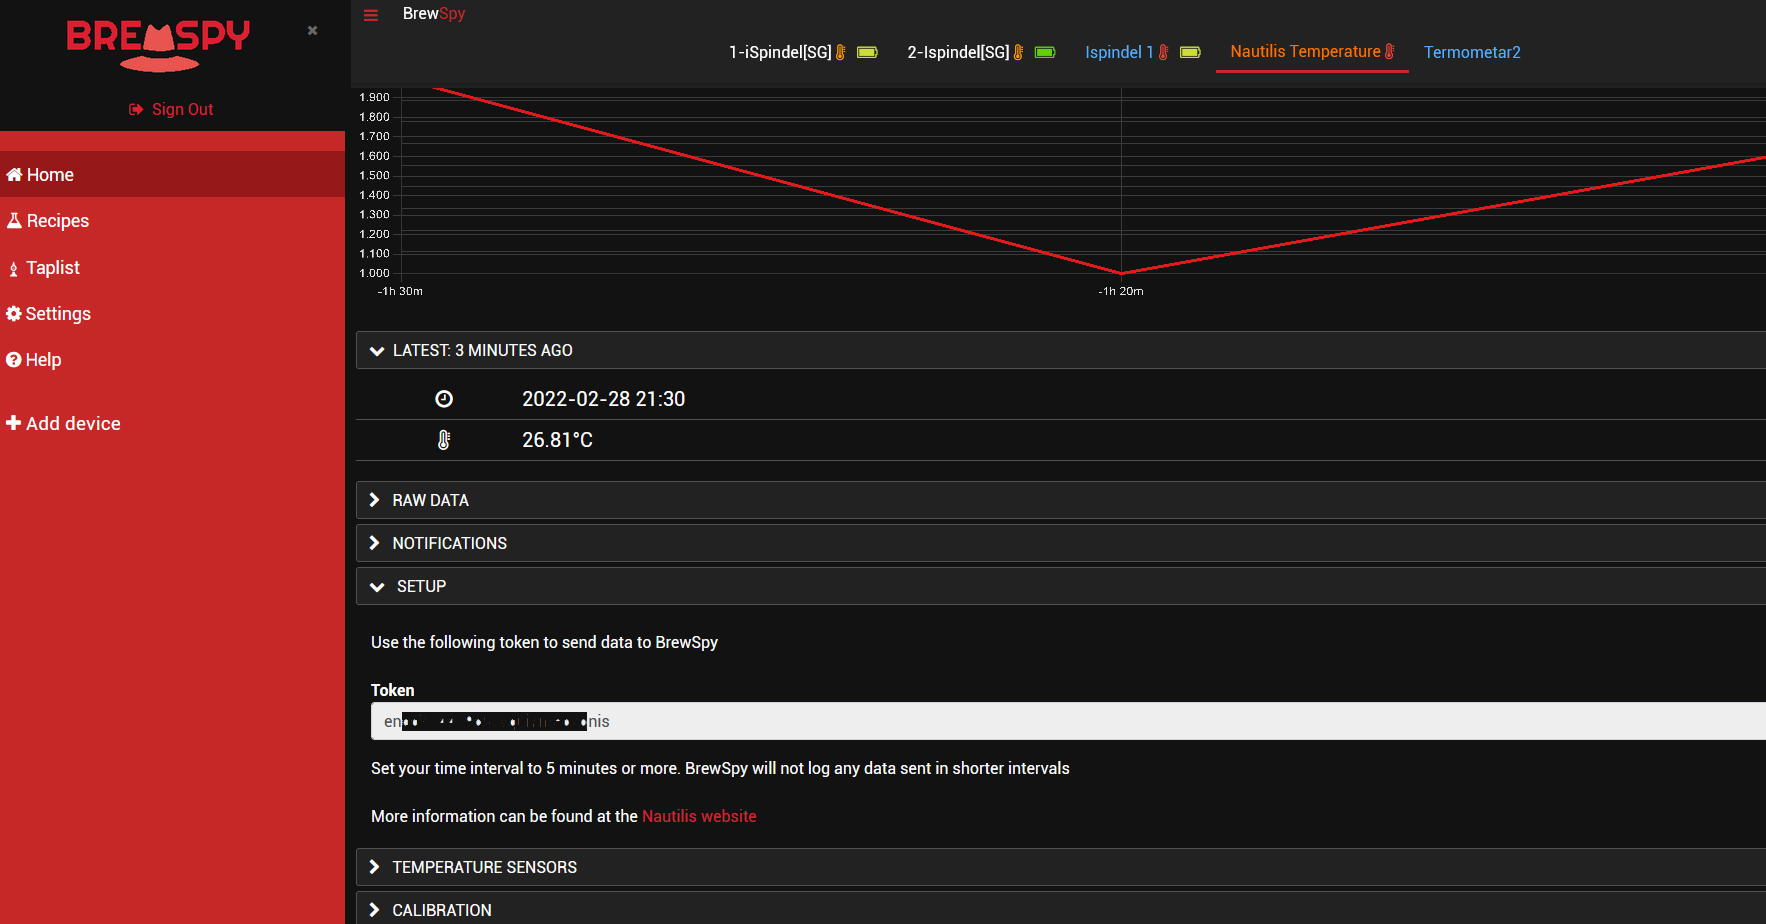
BrewSpy Custom Stream to send the temperature of the thermometer from the relay: The BrewSpy service must be marked and stored on the relay. Then a new field appears in the relay settings: Custom Stream URI in which you need to paste the BrewSpy token from setup menu.
Temperature sending interval is min 300 seconds!
To set up the Monitor.Beer service, you need:
1. Network name (watch your WiFi network name – be case sensitive), 2. Network password 3. Select service type (check Monitor.Beer), 4. PATH / URI (enter your personal PATH) / URI / ispindel /? Your username).
Unclaimed fields must be empty.
– In iSpindel settings, the interval must be set to at least 900 s (15min).
-The first time you connect to a service the name of your hydrometer is saved to the server and only then you can use it in the application. In the service, the calibration formula you are using must be specifically pasted.
 To set up the Grainfather service you need:
1. Network name (name of your WiFi network – pay attention to lowercase – uppercase letters), 2. Network password (password of your WiFi network) 3. Select service type (mark Grainfather); save these settings and go back – then a new field appears in which you enter the rest data, 4. PATH / URI (enter the url of your iSpindel).
Currently, only 1 iSpindle can be connected to Grainfather.
– In the iSpindel settings, the interval must be set to at least 900 s (15min).
Grainfather Custom Controller to send the temperature of the thermometer from the relay: The Grainfather service must be marked and stored on the relay. Then a new field appears in the relay settings: Custom Stream URI in which you need to paste the Grainfather URI for the Custom controller.
Custom controller URI should look like example: /iot/abc-efg/custom
The temperature appears on the application in an interval of 15 minutes (900 seconds).
 To set up the Little Bock service you need:
1. Network name (name of your WiFi network – pay attention to lowercase – uppercase letters), 2. Network password (password of your WiFi network) 3. Select service type (mark Little Bock);save these settings and go back – then a new field appears in which you enter the rest data, 4. PATH / URI (enter the url of your iSpindel).
Currently, only 1 iSpindle can be connected to Little Bock.
– In the iSpindel settings, the interval must be set to at least 900 s (15min).
 To set up the Brewers Friend service you need:
1. Network name (name of your WiFi network – pay attention to lowercase – uppercase letters), 2. Network password (password of your WiFi network) 3. Select service type (mark Brewers Friend); save these settings and go back – then a new field appears in which you enter the rest data, 4. PATH / URI (enter the url of your iSpindel: /ispindel_sg/API KEY Your API key can be found under Integrations. https://www.brewersfriend.com/homebrew/profile/integrations).
Currently, only 1 iSpindle can be connected to Brewers Friend.
– In the iSpindel settings, the interval must be set to at least 900 s (15min).
 To set up the BrewBench service you need:
1. Network name (name of your WiFi network – pay attention to lowercase – uppercase letters), 2. Network password (password of your WiFi network) 3. Select service type (mark BrewBench); save these settings and go back – then a new field appears in which you enter the rest data, 4. TOKEN (enter iSpindel token) 5.PATH / URI (For SG enter the url. /ispindel_sg/ For Plato enter: /ispindel/
Currently, only 1 iSpindle can be connected to BrewBench.
– In the iSpindel settings, the interval must be set to at least 900 s (15min).
You can see the details of the service on the website: https://www.brewbench.co/
 To set up the MQTT service, you need to:
1. Network name (watch out for your WiFi network – be case sensitive), 2. Network password 3. Select MQTT service, save these settings and go back – then a new field appears in which you enter the rest data 4. MQTT server, 5. MQTT username, 6.MQTT Pass. The Port is hard-coded to 1883. Temperature sending interval is minimum 10 seconds.
Click the SUBMIT button and reboot the device.
 To set up the Home Assistant service, you need to:
Connecting a device to MQTT and integrating it with Home Assistant involves establishing communication between the device and the MQTT broker, and then configuring Home Assistant to automatically recognize and interact with the device. Here’s a simplified description without delving into the YAML configuration file:
Connecting Your Device to MQTT:
Set Up MQTT Broker: Start by configuring an MQTT broker, either locally (e.g., Mosquitto) or using a cloud-based service.
Device Configuration: Ensure your device supports MQTT and configure it to connect to the MQTT broker. Provide the necessary credentials such as the broker’s IP address, port, and authentication details.
Integrating with Home Assistant:
Install MQTT Integration: Within Home Assistant, install the MQTT integration to enable communication with devices using the MQTT protocol.
Auto-Discovery: Utilize Home Assistant’s MQTT Auto-Discovery feature. As the device publishes data to MQTT topics, Home Assistant automatically detects and configures corresponding entities (e.g., sensors, switches).
Device Appears in Home Assistant: After configuration, your device will appear in Home Assistant as entities representing different aspects of the device, such as temperature sensors or switches.
Customization (Optional): Home Assistant allows customization of entity names, icons, and other attributes. Customize the appearance of your device within Home Assistant based on your preferences.
By following these steps, your device seamlessly integrates into your Home Assistant setup. You can monitor its status, receive sensor data, and incorporate it into your home automation routines. The MQTT and Home Assistant combination offers flexibility for customization and control to suit your specific needs.
Sending interval is minimum 10 seconds
 To set up the HTTP service (for example: Fermentrack), you need to:
1. Network name (watch out for your WiFi network – be case sensitive), 2. Network password 3. Select HTTP service, save these settings and go back – then a new field appears in which you enter the rest data 4. TOKEN, 5. HTTP server, 6. URI
The Port is hard-coded to 80.
Temperature sending interval is minimum 10 seconds.
Click the SUBMIT button and reboot the device.
-Firmware Update Over-the-Air programming (OTA) is a wireless upgrade of the device firmware. Opening the menu will open you an upgrade page. You find the latest firmware on the device you connected to the website and upload the same to the system. when you get the notification Ok, the firmware has been successfully upgraded.
-Audio alarm – If necessary, it is possible to turn off / on the audible alarm
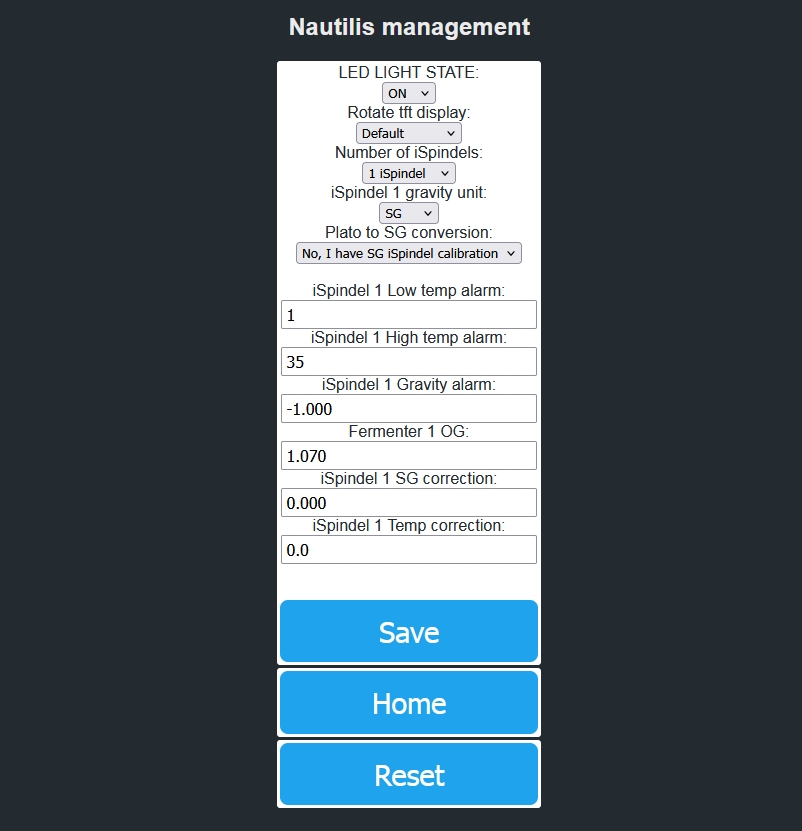
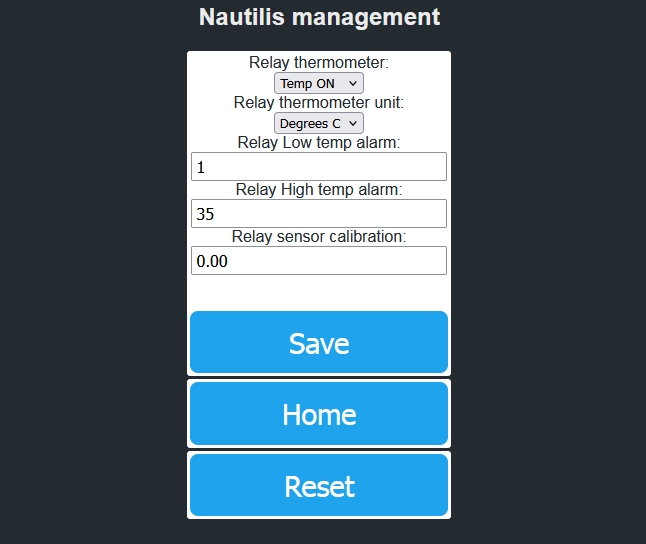
– Management (Selecting the number of available hydrometers, SG or Plato unit for each iSpindel, P to SG conversion, set high, low alarms and gravity alarm)
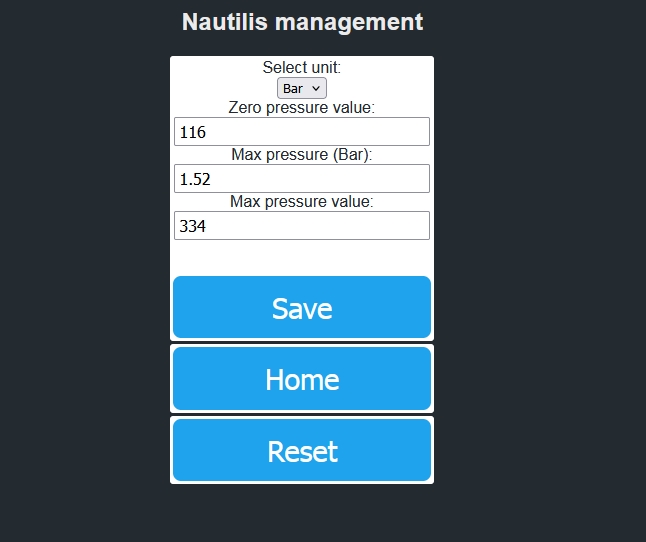
-Pressure sensor Here you can edit and enter pressure sensor calibration data
– Termomether In the thermometer settings you can switch the thermometer on and off and when it is on select the unit in steps C or steps F. You can also change the low or high temperature alarm here.
– Measured data
-Reboot – Opening this link will reboot the device.
If You use Hydrom
 Information on setting up the Nautilis iRelay can be found on the Hydro website. The Hydrom is a smart hydrometer for measuring the density of the liquid. To achive this, you put the calibrated Hydrom in the liquid and can calculate the buoyancy and…
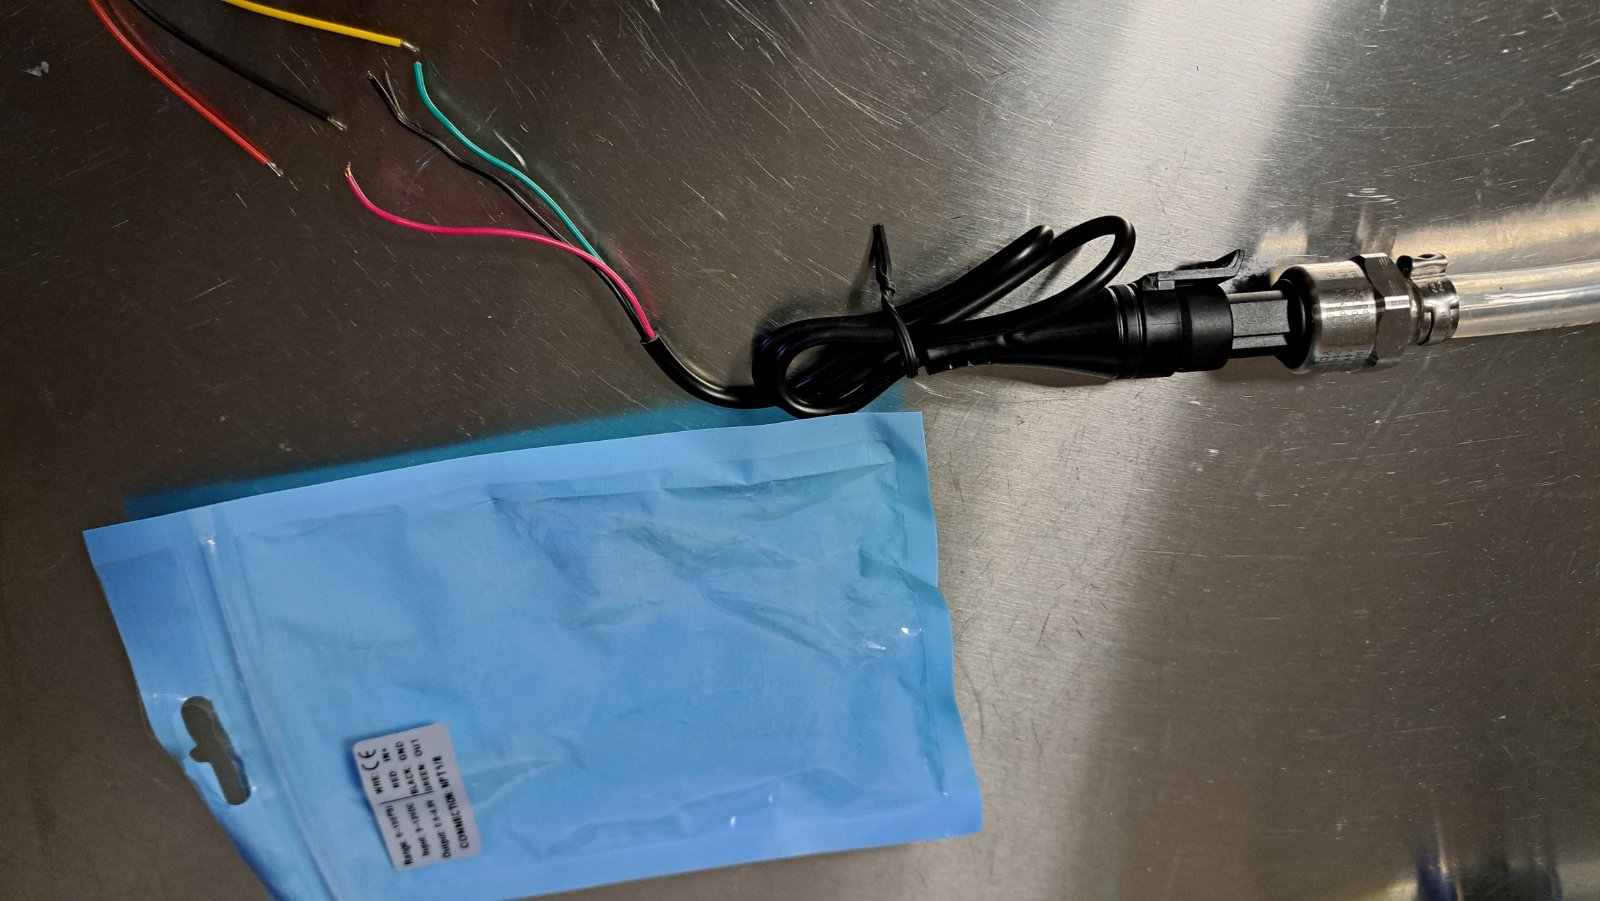
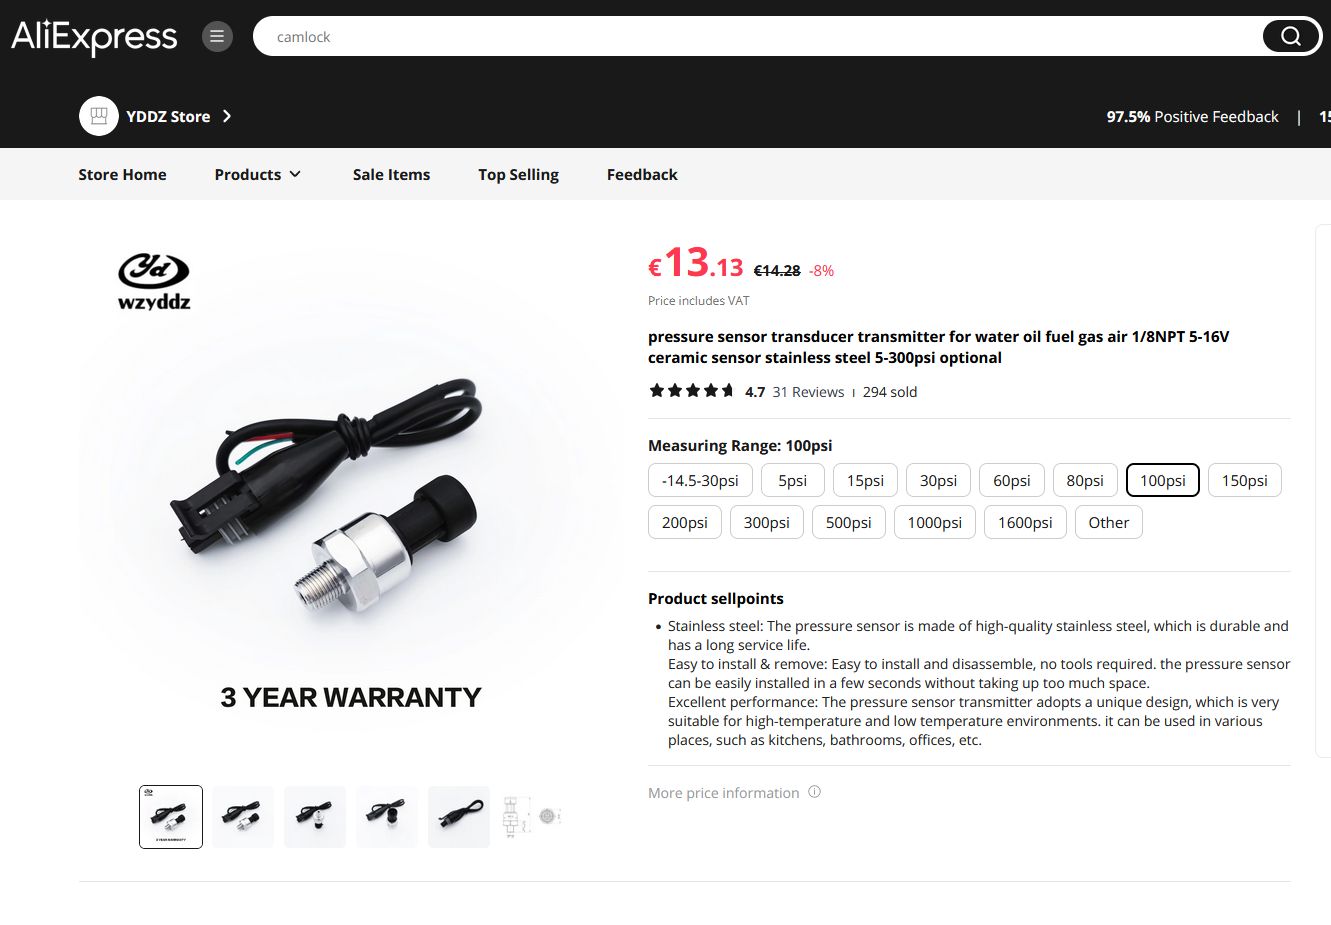
How to connect wires and pipes to a pressure sensor
With iPressure or iRelay supporting the pressure sensor, you will receive all the preparation in the device with wires that connect to the internal connector. You only need to connect 3 wires from the pressure sensor to them. The pressure sensor has wires in 3 colors: Black, Red, and most commonly Green. Connect the black sensor wire to the black device wire, the red sensor wire to the red device wire, and the green sensor wire to the yellow device wire. If you want to extend the sensor wire, you can also do so with any thin wire without affecting measurement accuracy. Finally, protect the wire with heat shrink tubing.
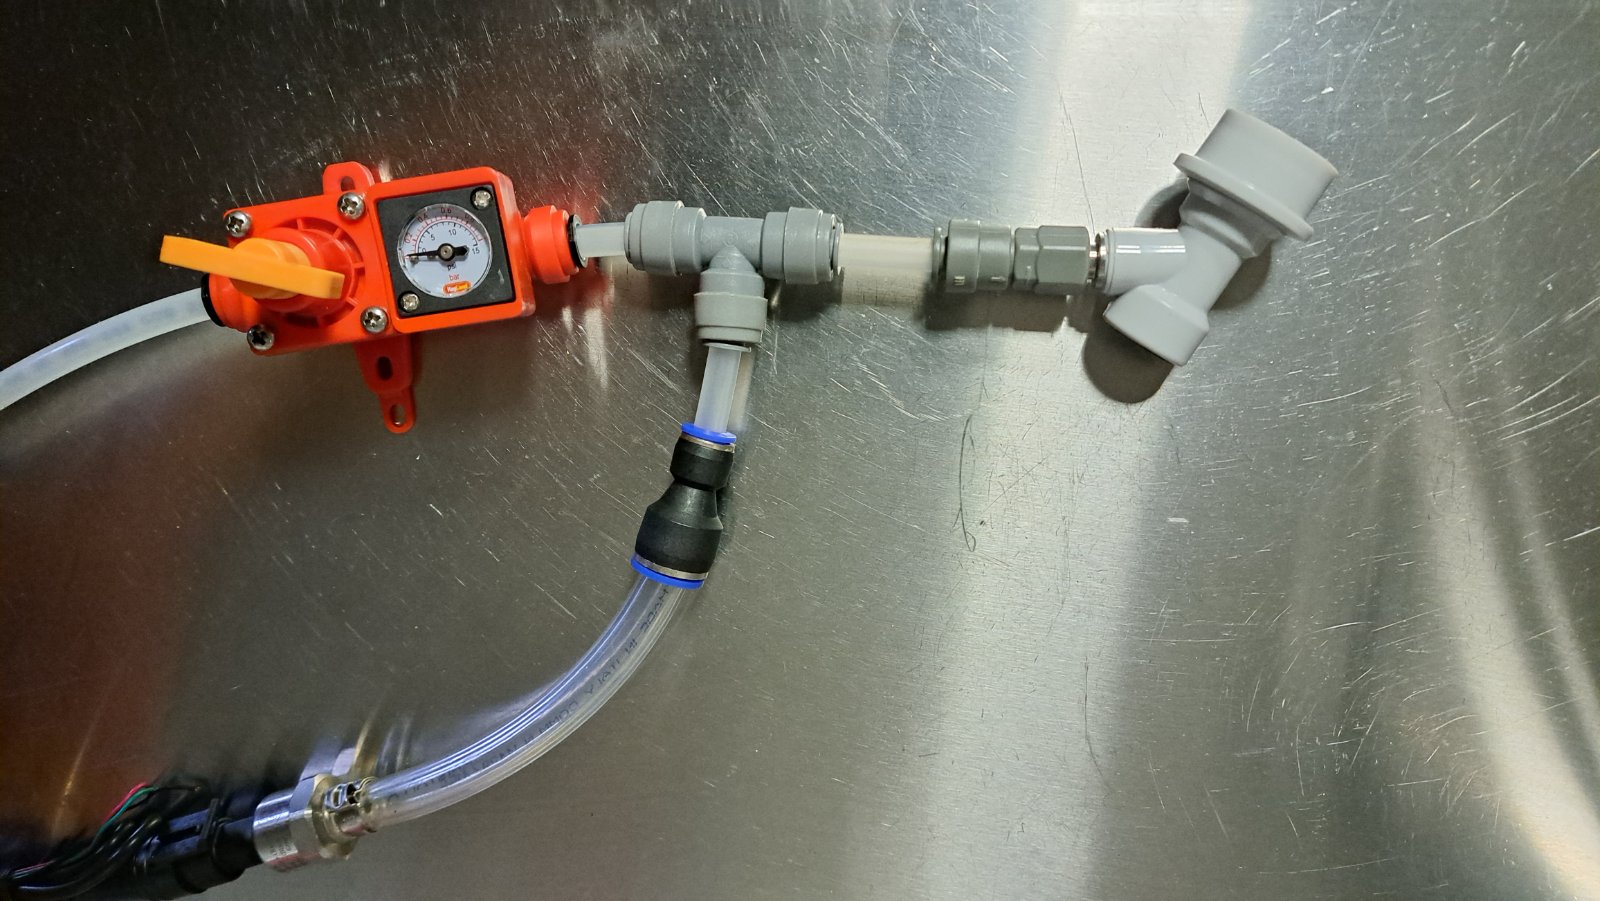
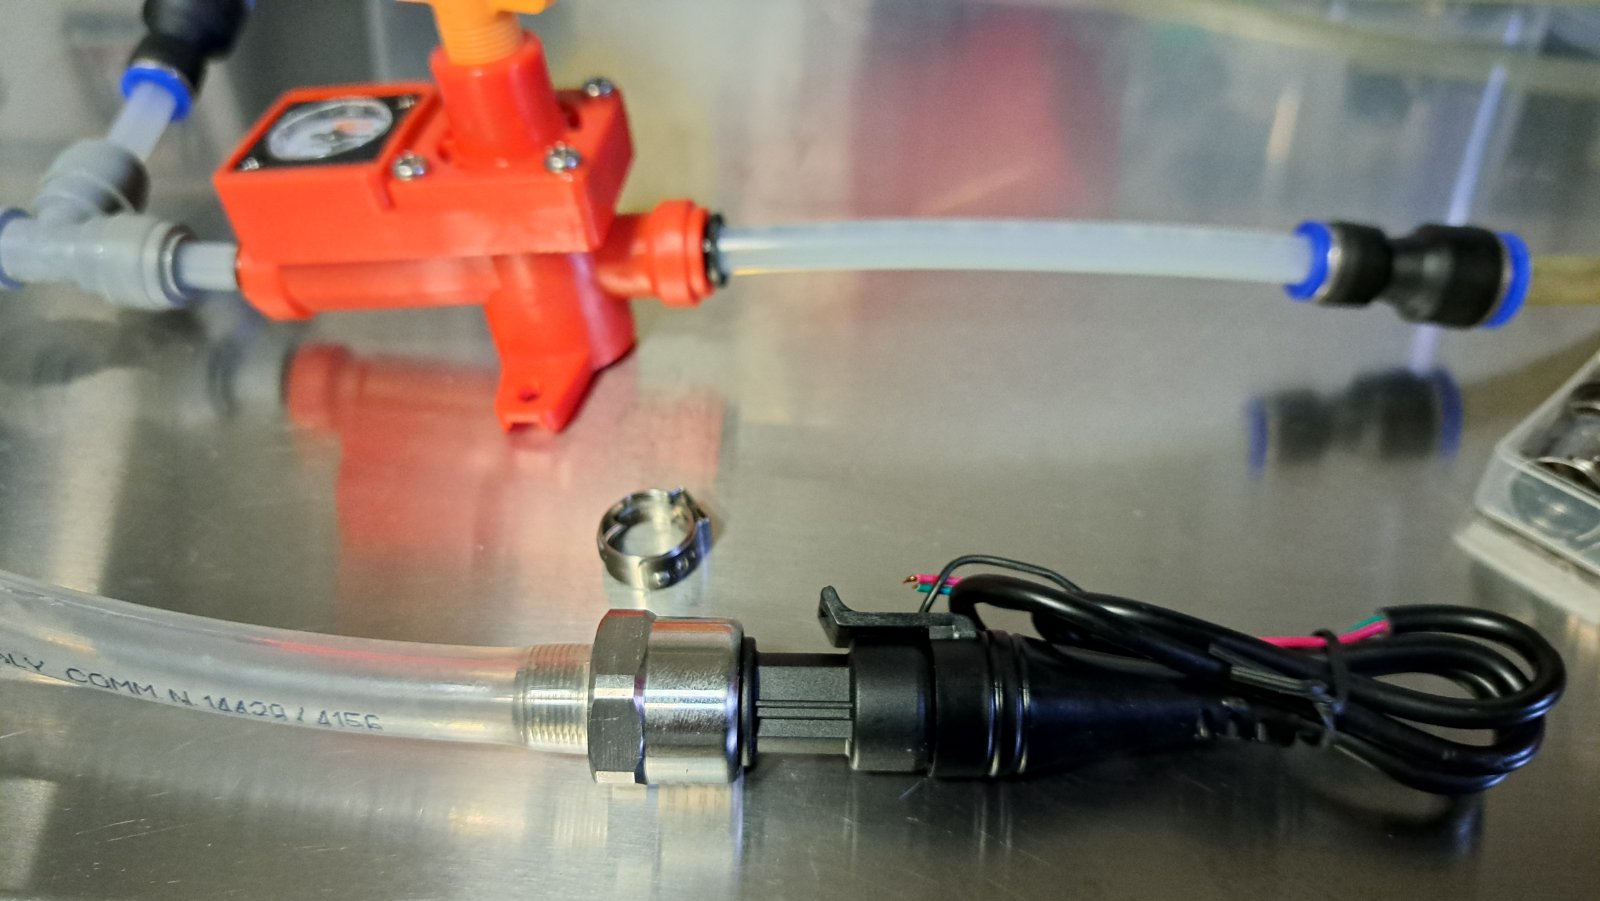
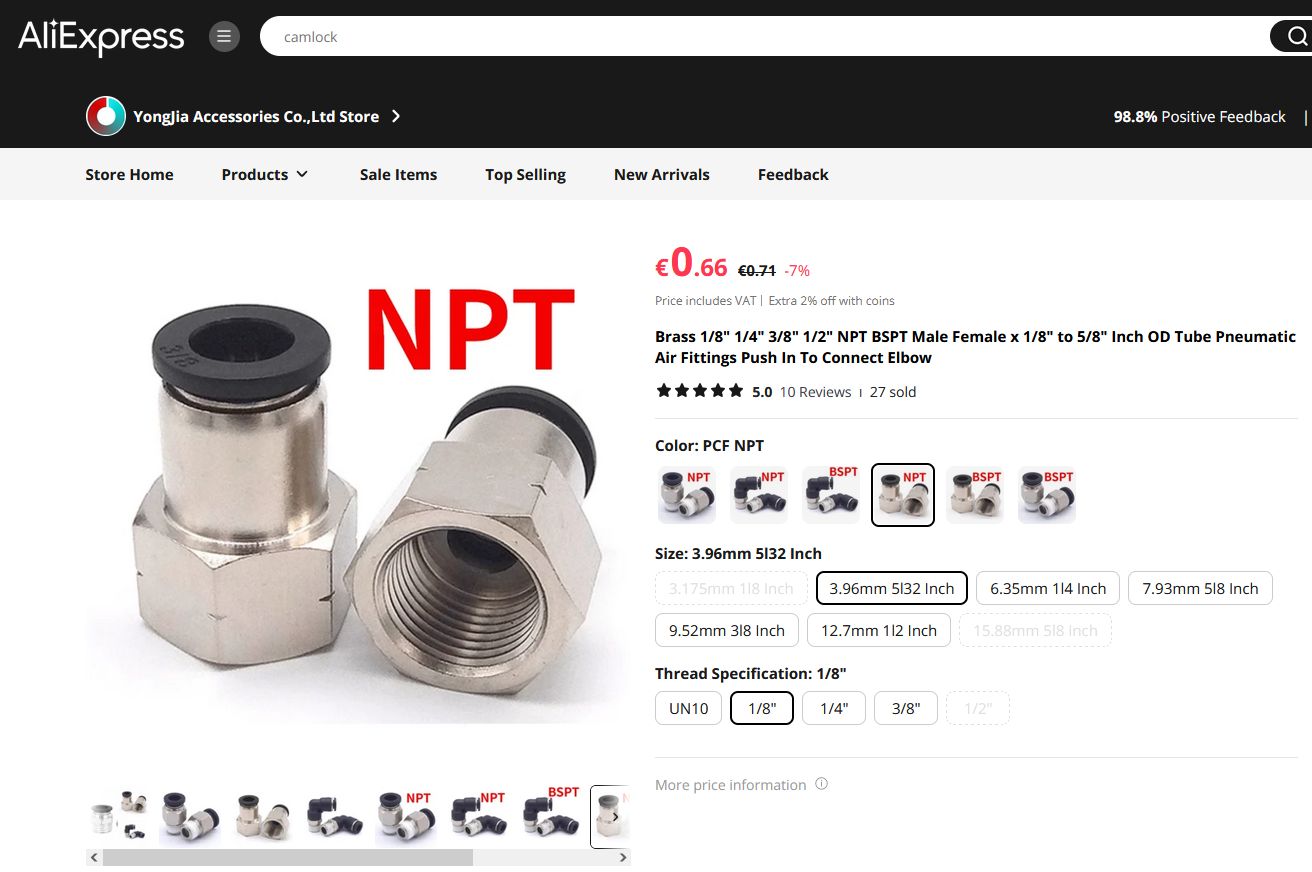
To connect pipes to the pressure sensor, you have several options: The simplest method is to purchase a Brass 1/8″ NPT Female to 5/8″ Inch OD Tube Pneumatic Air Fitting. Then, you only need an 8mm tube that connects to the Kegland Spunding Valve. If you don’t have the fitting, there is also a DIY method you can use. You can thread a 12mm tube onto the sensor and secure it with a hose clamp. Then, attach a reducer to the 12mm tube to match the size of the tube you are using.